Generating thumbnails with the Cognitive Services Computer Vision API
Tuesday, 03 May 2016
Thumbnail generation is definitely not a new idea, but the clever bit is that not only can the API resize an image to your required height and width but it has a flag called 'Smart Crop' which identifies the 'region of interest' in the image and automatically centers the crop around that so you don't end up accidentally cutting people faces off!
#cognitive-services#computer-vision
This article was published at GitHub. It is open source and you can make edits, comments etc.
I'm continuing to explore Microsoft Cognitive Services. This is a range of 21 public REST APIs, backed by Machine Learning which you can use in your applications. They do incredibly cool things and I've blogged about them before a few times:
- Introducing HowHappy.co.uk
- Using the Cognitive Services Emotion API in C# and JavaScript
- Machine Learning is for Muggles too!
The one I've been looking at most recently is the Computer Vision API. Not because I'm especially interested in computer vision, but because my boss, Andrew Spooner is and if he is, I figured I should look at it too! :) Computer Vision does lots of amazing things with digital images. It can identify objects in images (including celebrities) and it can read text in images. However, one of the more mundane but useful features is the ability to generate thumbnails. Thumbnail generation is definitely not a new idea, but the clever bit is that not only can the API resize an image to your required height and width but it has a flag called 'Smart Crop' which identifies the 'region of interest' in the image and automatically centers the crop around that so you don't end up accidentally cutting people faces off! In this article, I'll work through a very simple example of using this API in ASP.NET Core 1. I'm also working on a JavaScript version but I cannot get it working at the moment so I'll update this when I have it.
How does the Computer Vision API work?
The API works by taking an image (either as a stream, link to an online image or form data). It also requires a width, height and optionally a boolean indicating whether you need 'smart cropping' or not. It will then do its magic and return to you an image smartly cropped to the dimensions you specified. The image will be returned as a byte array which you can then either save or post directly to you application's UI. To get started with the API, have a look at the demo application here (scroll to the bottom). This lets you use sample image or upload your own and see how the API smart crops them to a bunch of pre-defined sizes. 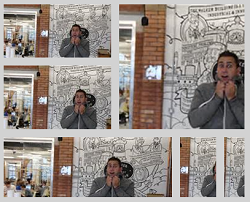
Step 1: Get your key
As with almost any API, your first task is to obtain an API key. This is really easy to do for all Cognitive Services APIs. You simply go to the API's home page (for the Computer Vision API it is https://www.microsoft.com/cognitive-services/en-us/computer-vision-api) and click the 'Get started for free' button. It will ask you to sign in with a Microsoft account (Hotmail.com, Outlook.com, Live.co.uk etc). Once you are signed in it will ask you to 'request new keys' and subscribe to the API. Most of the APIs have a free pricing tier which permits a number of requests per month for free. Typically it is 5,000 but can vary. Once subscribed, you will be able to view your key. In most scenarios you only need your 'primary key' which will look something like this 982f5abd67b74434935027f65a41a4bd
Step 2: Make a request
Once you have your key, you can go ahead and make the request in your app. The API requires several things attached to your request in order to work, they are as follows
The Endpoint
The API endpoint is https://api.projectoxford.ai/vision/v1.0/generateThumbnail
Query Parameters
The API requires three query parameters, they are:
width: The width (in px) that you want you thumbnail to beheight: The height (in px) that you want you thumbnail to besmartCropping: A boolean value. If true, the api will apply smart cropping to center the thumbnail on the 'region of interest'. If false, it will just crop to the center. This is an optional value
Ocp-Apim-Subscription-Key header
When you sign up to the API, you'll get an API key. You need to pass this with your request as a header called Ocp-Apim-Subscription-Key. This is a common approach amongst all Cognitive Services APIs.
Body
You'll also need to pass the original image in the body. As you'll see in the API Reference, the image is accepted in a application/json format body which is a URL to an image online. If you want an image to test with you can use this one. The JSON in this case looks like this
{ "url": "https://raw.githubusercontent.com/martinkearn/Content/master/Blogs/Images/OffCenterMartin.png" }
The API also accepts a binary image file in application/octet-stream format. This is great for scenarios where you already have the binary file in code. Perhaps it has been submitted from the user or you are pulling the image from Azure Storage, OneDrive etc. The API also accepts a binary image file in multipart/form-data format. This is useful if you want to post the values directly from a HTML form.
Step 3: Try it out in the test console first
There is a great test console for the API, which lets you try out your parameters and test the results without writing any code. The inputs are exactly the same as the ones defined above. You should get a 200/OK response. and you should see a load of stuff in the 'Response Content' which looks like corrupt data, but that is actually the binary data for your thumbnail image. 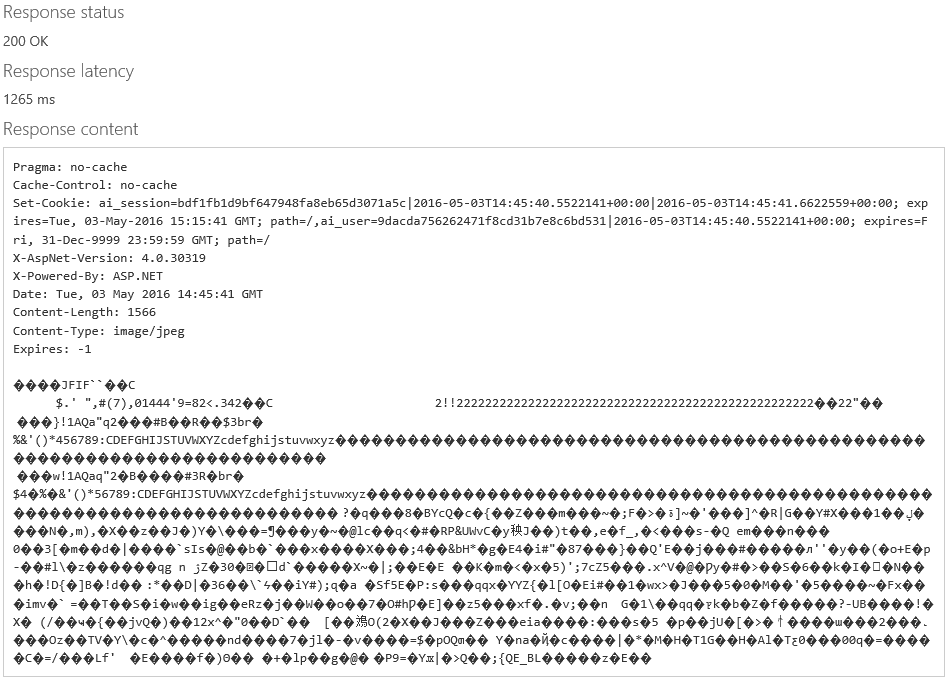
Code samples
As mentioned at the top, I have implemented the the Computer Vision Thumbnail API both the URL and the File request options in both C# (via ASP.Net Core 1.0) and JavaScript with JQuery. You can see these implementations in my Cognitive-Computer-Vision-Thumbnails-Sample Github Repo. For completeness, here are the main sections of code that you'll need
C# File/Octet-Stream sample (ASP.NET Core 1.0)
This is a C# example using ASP.NET Core 1.0 MVC. This is not the full code, but an extract from the main 'Home' controller. See the GitHub Repository for the full, working sample which also includes an example using URL
public class HomeController : Controller
{
    //_apiKey: Replace this with your own Cognitive Services Computer Vision API key, please do not use my key. I include it here so you can get up and running quickly but you can get your own key for free at https://www.microsoft.com/cognitive-services/en-us/computer-vision-api
    public const string _apiKey = "382f5abd65f74494935027f65a41a4bc";

    //_apiUrl: The base URL for the API. Find out what this is for other APIs via the API documentation
    public const string _apiUrlBase = "https://api.projectoxford.ai/vision/v1.0/generateThumbnail";

    // GET: Home/FileExample
    public IActionResult FileExample()
    {
        return View();
    }

    // POST: Home/FileExample
    [HttpPost]
    [ValidateAntiForgeryToken]
    public async Task<IActionResult> FileExample(IFormFile file)
    {
        //get input data from form
        var width = (string.IsNullOrEmpty(Request.Form["width"].ToString())) ?
            "100" :
            Request.Form["width"].ToString();

        var height = (string.IsNullOrEmpty(Request.Form["height"].ToString())) ?
            "100" :
            Request.Form["height"].ToString();

        var smartcropping = (string.IsNullOrEmpty(Request.Form["smartcropping"].ToString())) ?
            "false" :
            "true";

        using (var httpClient = new HttpClient())
        {
            //setup HttpClient
            httpClient.BaseAddress = new Uri(_apiUrlBase);
            httpClient.DefaultRequestHeaders.Add("Ocp-Apim-Subscription-Key", _apiKey);

            //setup data object
            HttpContent content = new StreamContent(file.OpenReadStream());
            content.Headers.ContentType = new MediaTypeWithQualityHeaderValue("application/octet-stream");

            // Request parameters
            var uri = $"{_apiUrlBase}?width={width}&height={height}&smartCropping={smartcropping}";

            //make request
            var response = await httpClient.PostAsync(uri, content);

            //read response and write to view data
            var responseContent = await response.Content.ReadAsByteArrayAsync();
            ViewData["thumbnailImage"] = BytesToSrcString(responseContent);
        }

        return View();
    }

    private string BytesToSrcString(byte[] bytes) => "data:image/png;base64," + Convert.ToBase64String(bytes);
}
If you want to display the image in your view you can simply do this <img src="@ViewData["thumbnailImage"]" />
JavaScript File/Octet-Stream Sample
The sample below shows how to do the same thing using JavaScript and the XMLHttpRequest. This time we use the URL option rather than sending the binary data. The code is here: https://github.com/martinkearn/Cognitive-Computer-Vision-Thumbnails-Sample/blob/master/Javascript%20JQuery/URLExample.html
In Summary
The Cognitive Services APIs are very simple to get started with and use in your applications. Hopefully the sample in this article and the accompanying GitHub Repository will help you get up and running with the Computer Vision API. I plan to do similar articles on other Cognitive Services APIs. Please use the comments if there are particular APIs you'd like to see examples of.
Got a comment?
All my articles are written and managed as Markdown files on GitHub.
Please add an issue or submit a pull request if something is not right on this article or you have a comment.
If you'd like to simply say "thanks", then please send me a .